|
|
|
| Title | Make a close-up window for an image in Visual Basic 6 |
|---|
| Description | This example shows how to make a close-up window for an image in Visual Basic 6. |
|---|
| Keywords | closeup, close-up, closeup window, close-up window, zoom, picture, image, details, Visual Basic 6, VB6 |
|---|
| Categories | Graphics |
|---|
|
|
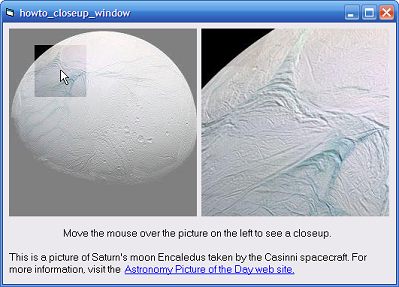
Lately I've seen several web sites that display a close-up window that displays zoomed-in piece of an image so you can see extra details. You move the mouse around on the main image and it displays the close-up in a separate picture. This example does something similar.
The close-up is really just a full-scale copy of the original image. (The "main" image is the same image at a smaller scale.) To display a close-up, the program displays the full-scale image inside a PictureBox named picInner. That control sits inside a PictureBox named picOuter. By moving picInner inside picOuter, the program can display different pieces of the full-scale image.
Normally the program displays the original small-scale image. When the mouse enters that image, the program displays a shaded version. When the mouse leaves, it restores the original image.
The program executes the following code when the mouse moves over picWhole.
|
|
' Display the appropriate closeup.
Private Sub picWhole_MouseMove(Button As Integer, Shift As _
    Integer, X As Single, Y As Single)
Dim new_x As Single
Dim new_y As Single

    If Not tmrCheckMouse.Enabled Then
        ' Calculate picWhole's screen coordinates.
        upper_left.X = ScaleX(picWhole.Left, ScaleMode, _
            vbPixels)
        upper_left.Y = ScaleY(picWhole.Top, ScaleMode, _
            vbPixels)
        ClientToScreen hwnd, upper_left
        lower_right.X = ScaleX(picWhole.Left + _
            picWhole.Width, ScaleMode, vbPixels)
        lower_right.Y = ScaleY(picWhole.Top + _
            picWhole.Height, ScaleMode, vbPixels)
        ClientToScreen hwnd, lower_right

        ' Display the closeup image.
        picOuter.Visible = True

        ' Display the grayed-out image.
        picWhole.Picture = picGray.Picture

        ' Start the timer to see when the mouse leaves
        ' picWhole.
        tmrCheckMouse.Enabled = True
    End If

    ' Position picInner inside its parent to show the
    ' closeup.
    new_x = CSng(X) / picWhole.Width * picInner.Width - _
        CSng(picOuter.Width) / 2
    new_y = CSng(Y) / picWhole.Height * picInner.Height - _
        CSng(picOuter.Height) / 2
    If (new_x < 0) Then new_x = 0
    If (new_y < 0) Then new_y = 0
    If (new_x > picInner.Width - picOuter.Width) Then
        new_x = picInner.Width - picOuter.Width
    End If
    If (new_y > picInner.Height - picOuter.Height) Then
        new_y = picInner.Height - picOuter.Height
    End If
    picInner.Left = -CInt(new_x)
    picInner.Top = -CInt(new_y)

    ' Record the area we are viewing.
    ViewWidth = picOuter.Width * picSmall.Width / _
        picInner.Width
    ViewHeight = picOuter.Height * picSmall.Height / _
        picInner.Height
    ViewX = X - ViewWidth / 2
    ViewY = Y - ViewHeight / 2

    ' Draw the closeup area.
    picWhole.Refresh
End Sub
|
|
|
The program uses a Timer to determine when the mouse moves off of picWhole. If the Timer is not running, the program starts it. The code first finds the coordinates of picWhole and converts them into screen coordinates. It makes picOuter visible so the user can see close-ups and displays the greyed-out image stored in picGrey. It then enables the Timer.
Having dealt with the Timer, the code finds the area around the mouse. If that area lies partly outside of the main image, the code adjusts its X and Y coordinates so the area lies within the main image (so the close-up shows as much of the image as possible).
The code moves picInner within picOuter to display the correct piece of the full-scale image. It then records the area that it is displaying for picWhole to show and refreshes picWhole.
To determine when the mouse has left the image, the program uses a Timer. The following code shows the Timer's event handler.
|
|
' See if the mouse has left picWhole.
Private Sub tmrCheckMouse_Timer()
Dim pt As POINTAPI

    ' Get the cursor position.
    GetCursorPos pt

    ' See if the mouse is over the button.
    If pt.X < upper_left.X Or pt.X > lower_right.X Or _
       pt.Y < upper_left.Y Or pt.Y > lower_right.Y _
    Then
        ' It is no longer over the button.
        tmrCheckMouse.Enabled = False

        ' Display the clear image.
        picWhole.Picture = picSmall.Picture
        picOuter.Visible = False
    End If
End Sub
|
|
|
The Timer's event handler uses the GetCursorPos API function to see where the mouse is. If the mouse is not over picWhole, the Timer disables itself and displays the original small-scal image stored in picSmall.
The following code shows the main picture's Paint event handler.
|
|
' Draw the current viewing area.
Private Sub picWhole_Paint()
    If Not tmrCheckMouse.Enabled Then Exit Sub

    ' Draw the viewing area from picSmall onto picWhole.
    picWhole.PaintPicture picSmall.Picture, _
        ViewX, ViewY, ViewWidth, ViewHeight, _
        ViewX, ViewY, ViewWidth, ViewHeight
End Sub
|
|
|
This code copies the appropriate part of the small-scale original image in picSmall onto picWhole to show the area being displayed in the close-up.
|
| |

|
| |
|
|


